We just finished the install of our second water tank and we are in the process of cleaning up the boat and making the main cabin liveable. As unexpected boat projects go, this was as typical, quite expensive and very time consuming, but I am sure those memories will fade as we enjoy running water on the boat.
So here is the story from beginning to end, I will try to keep it as brief as I can.
Discovery
When Kinship was moved from Loyalist Cove’s yard in Millhaven back to the marina in Bath we discovered that the starboard water tank had leaked its contents into the bilge. A bit of poking around with a borescope revealed a small leak in the bottom of the tank.

The failure seems to within a weld and and might have been repairable, however the interior of the tank showed extensive corrosion so replacement was the obvious choice.
On the port tank we found similar corrosion on the interior and 2 spots where the water was leaching through the wall and floor of the tank

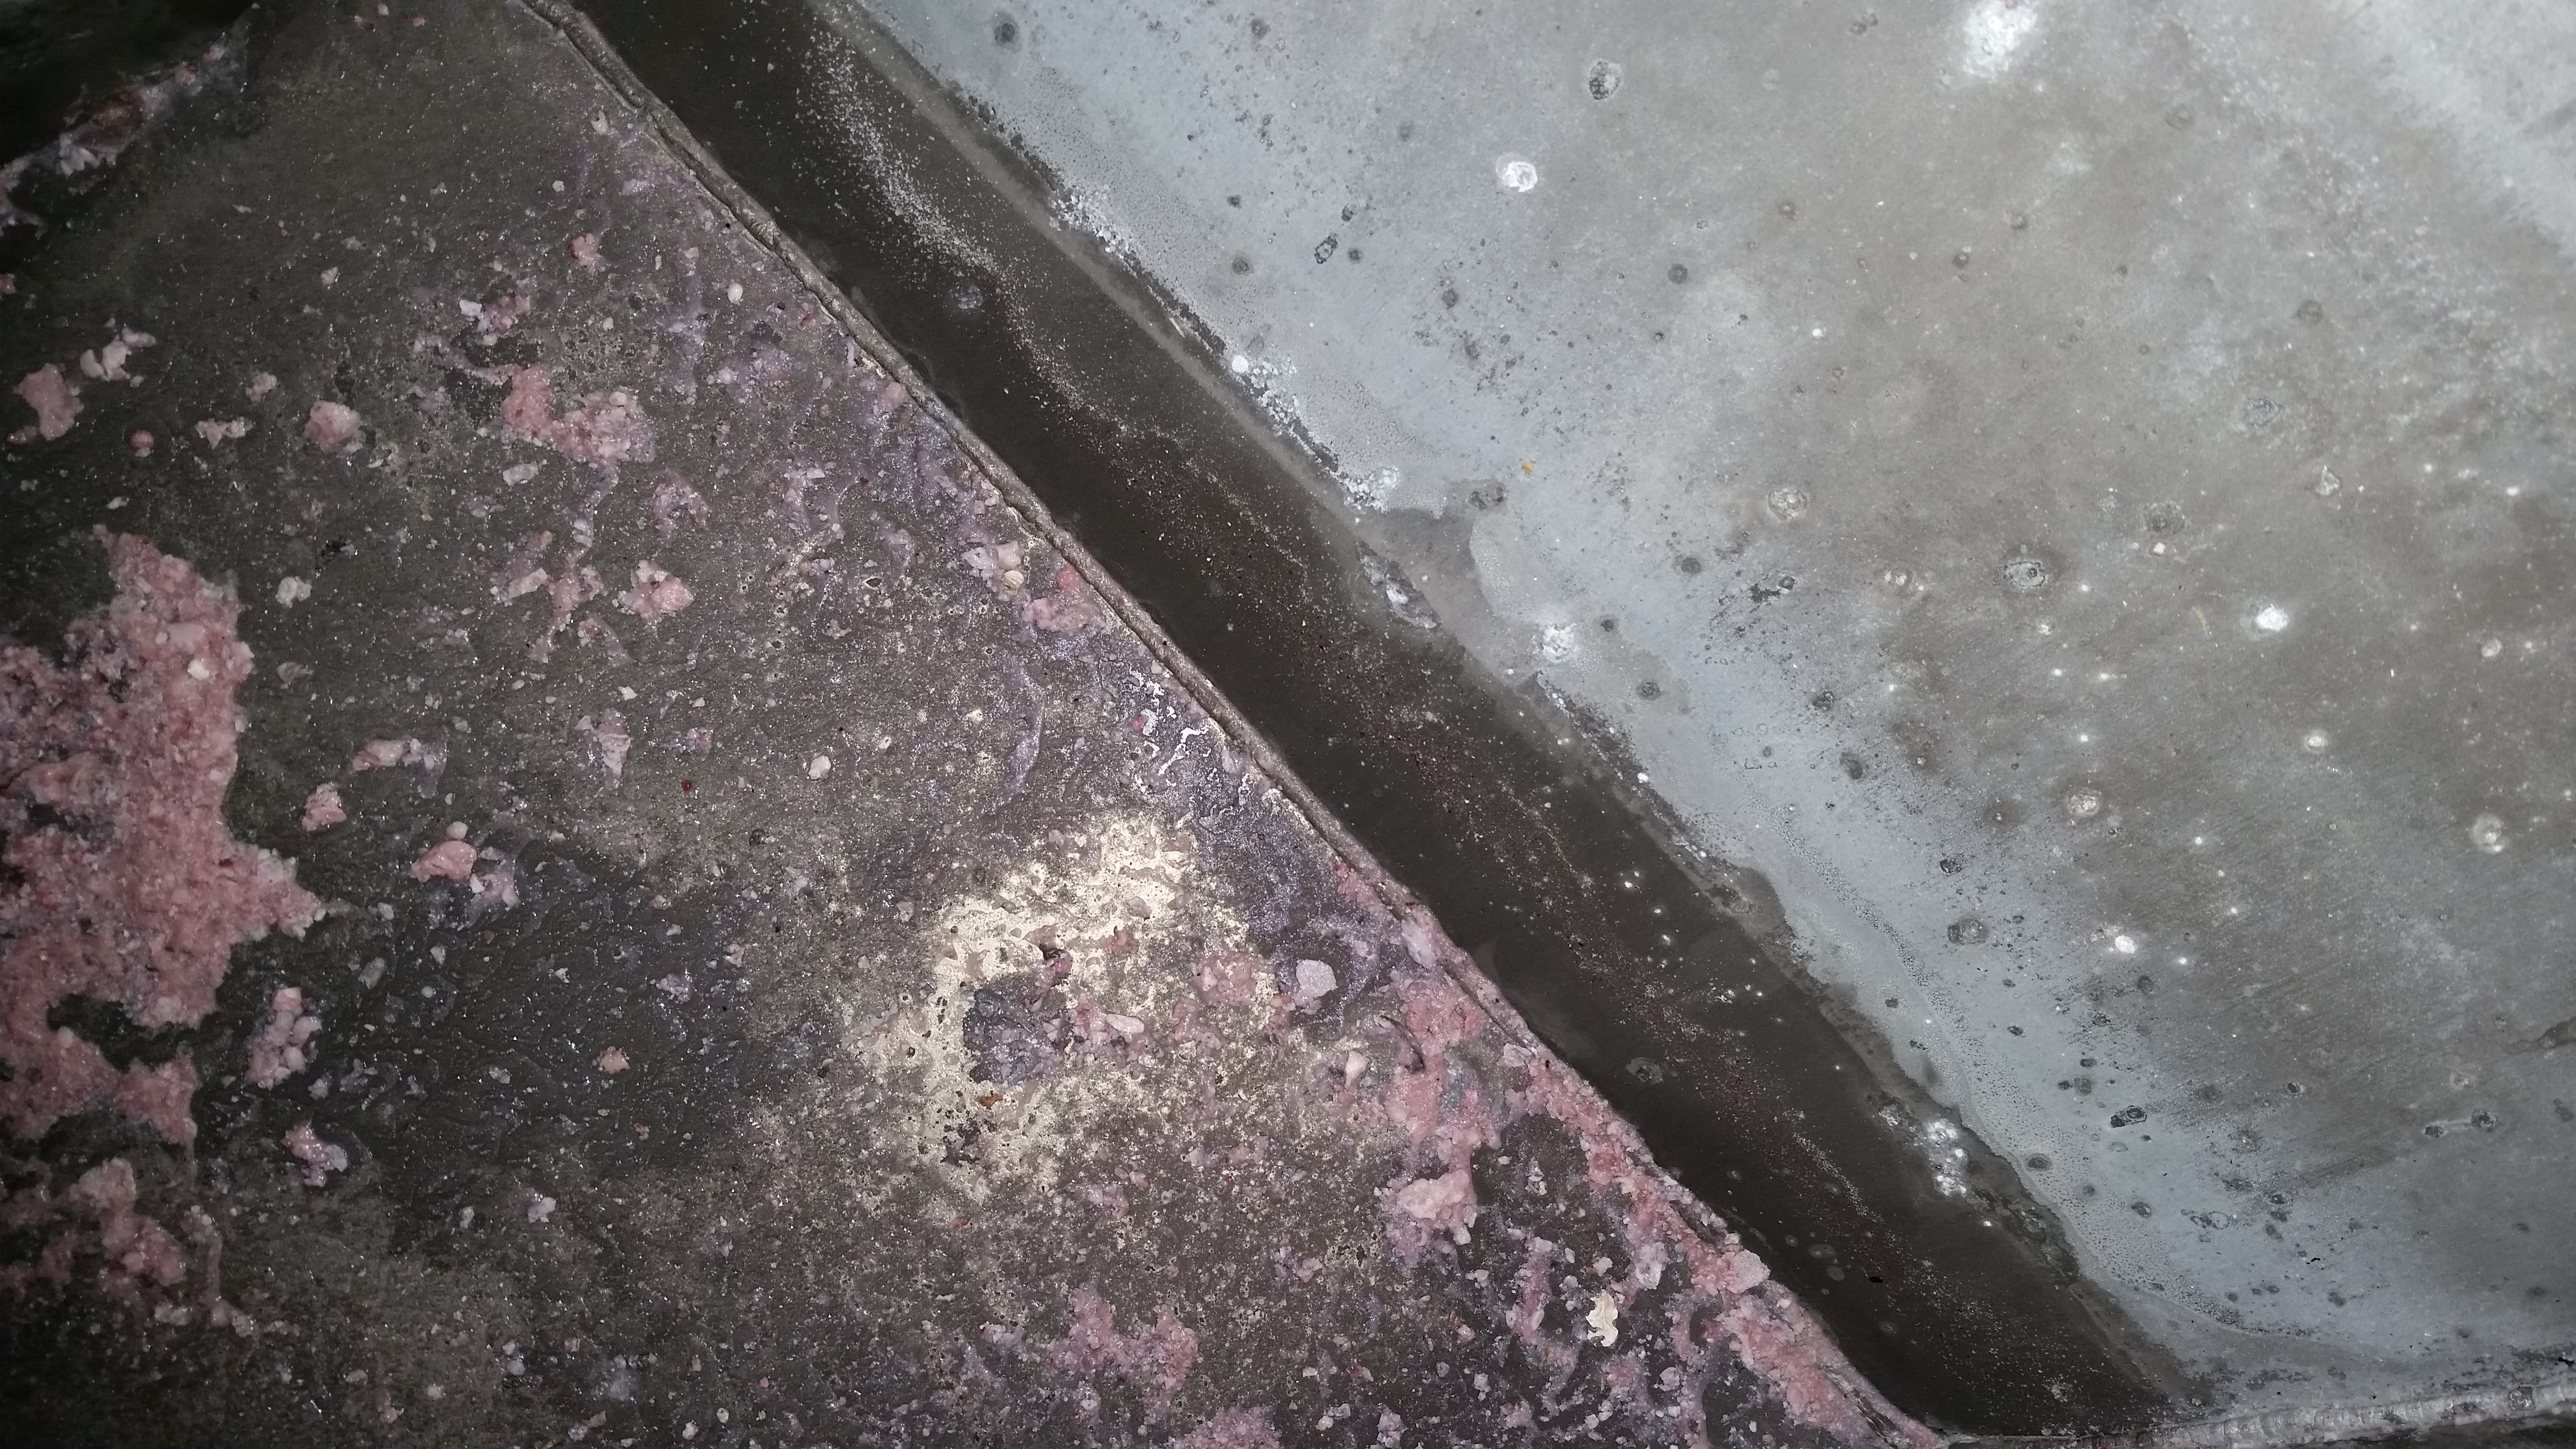
Our tanks were clearly at the end of their life and after seeing the corrosion I am not sure I would ever use aluminium tanks again, here is the state of the interior of one of the tanks.
Tank Removal
The interior of the Saga 43 was clearly built from the keel up. Both tanks are impossible to replace without significant carpentry. In retrospect, this is how I would remove the tanks:
- Remove the seats from the bench
- Remove the backs (This might involve some struggles and removal of various battens, and some swearing)
- Remove the bottoms of the seat back lockers
- Disconnect plumbing from the tank – samurai method strongly recommended, you are going to replace all the water lines anyway
- Trim the bulkhead in the seat backs at a steep angle to allow room to remove the tank this cut is too flat, better to cut down more to the batten on the hull
- Remove tank
Designing the Replacement Tanks
As we have a 3rd tank and a water maker, I took the easy route and replaced the tanks with the ones with almost the same size and shape. Material selection was a matter of some debate, the hive mind of the Saga mailing list favours aluminium but I had real issue with the performance of the tanks to I ruled it out. The best solution would likely be stainless steel but I did not have either a local supplier or the budget. I landed on welded 3/8 HDPE with Ontario Plastics, the same company that build my holding tank. Welded HDPE is a common choice for tanks in custom sailboats and
I shipped the old tanks to the supplier to ensure that the new tanks would fit. I moved the feed from the end of the tank to the top with a shallow sump to reduce the unusable capacity and to reduce the chances of leaks in the future.
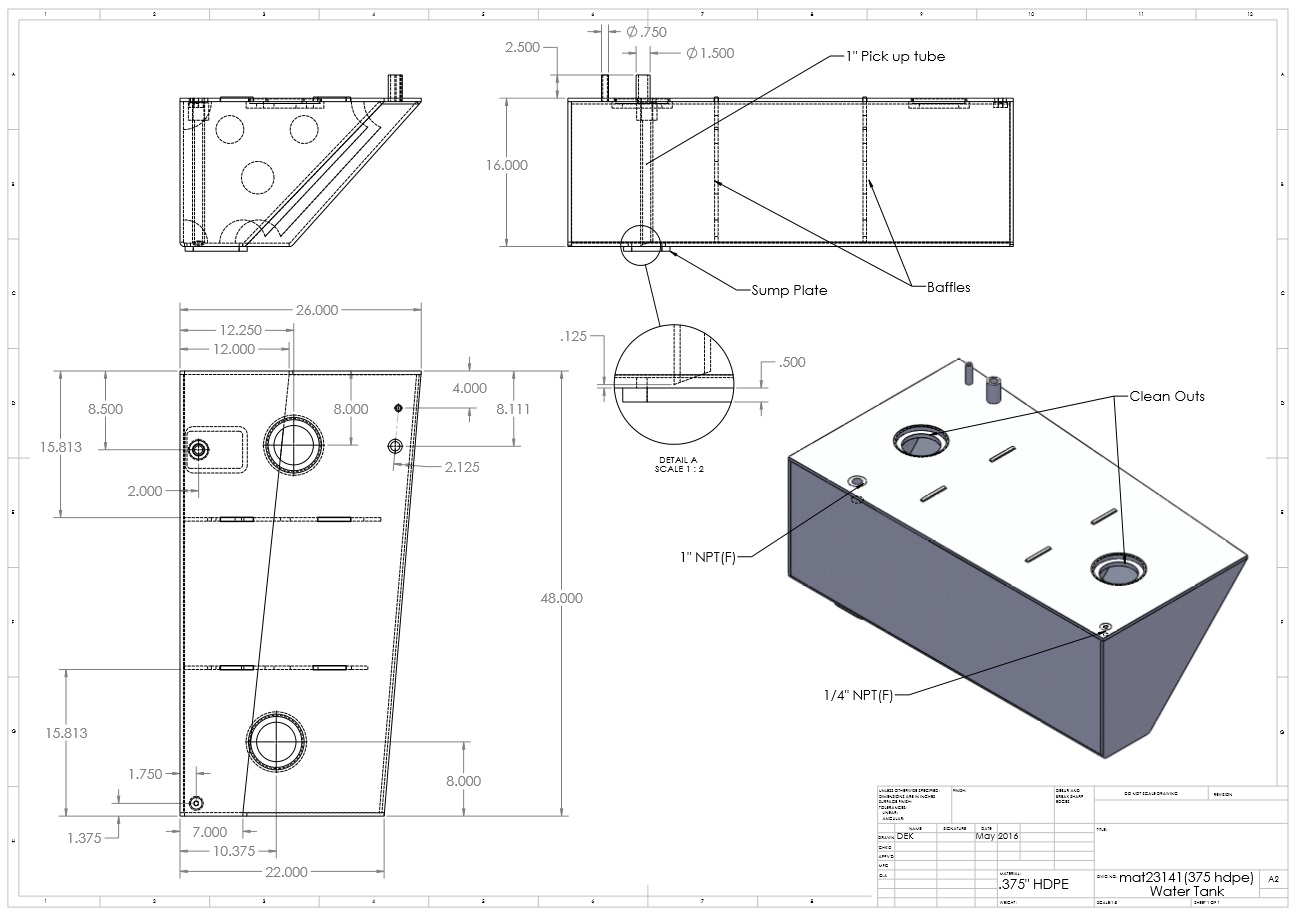
If I had the method to remove the tanks in an easy way, I would had considered building bigger tanks. There is a lot of room in the seat to allow this and with the bulkhead cut back, it would be possible to get a larger tank in. I would test this by adding polystyrene slabs to the existing tanks and trial fitting them to make sure the larger tank drops into place.
Tank Vents and a bit of a Problem
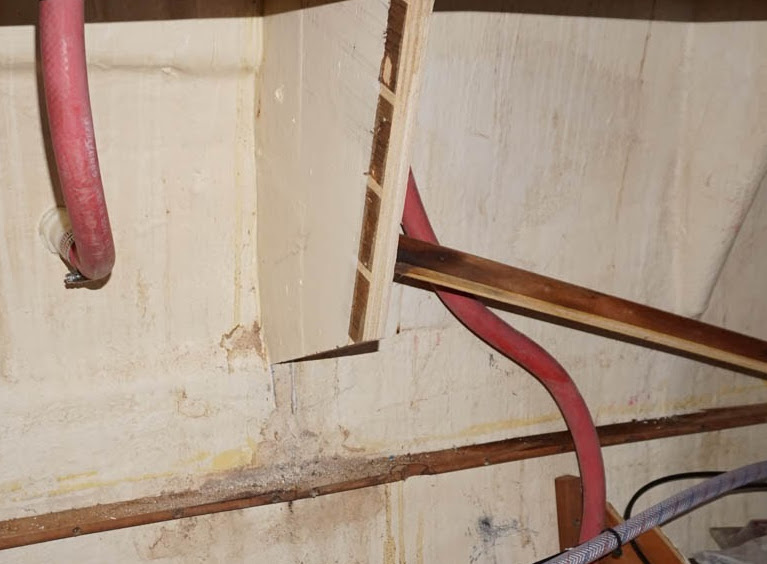
The tanks vent through water lines that go up to about 6 inches below the deck and then loop down behind the tanks and drain into the bilges. This is a great arrangement as it reduces the chances of saltwater contamination. The issue I found was that the starboard vent drained into a space with no drain to the bilge. the bulkhead at the aft end of the bench, by the nav table is joined to the keel supports in a “V” with nowhere for the water to go. I discovered this when I noticed that the bulkhead was discoloured and seemed to be failing, I pushed my finger through the wood, here is what it looked like after removing the rot.
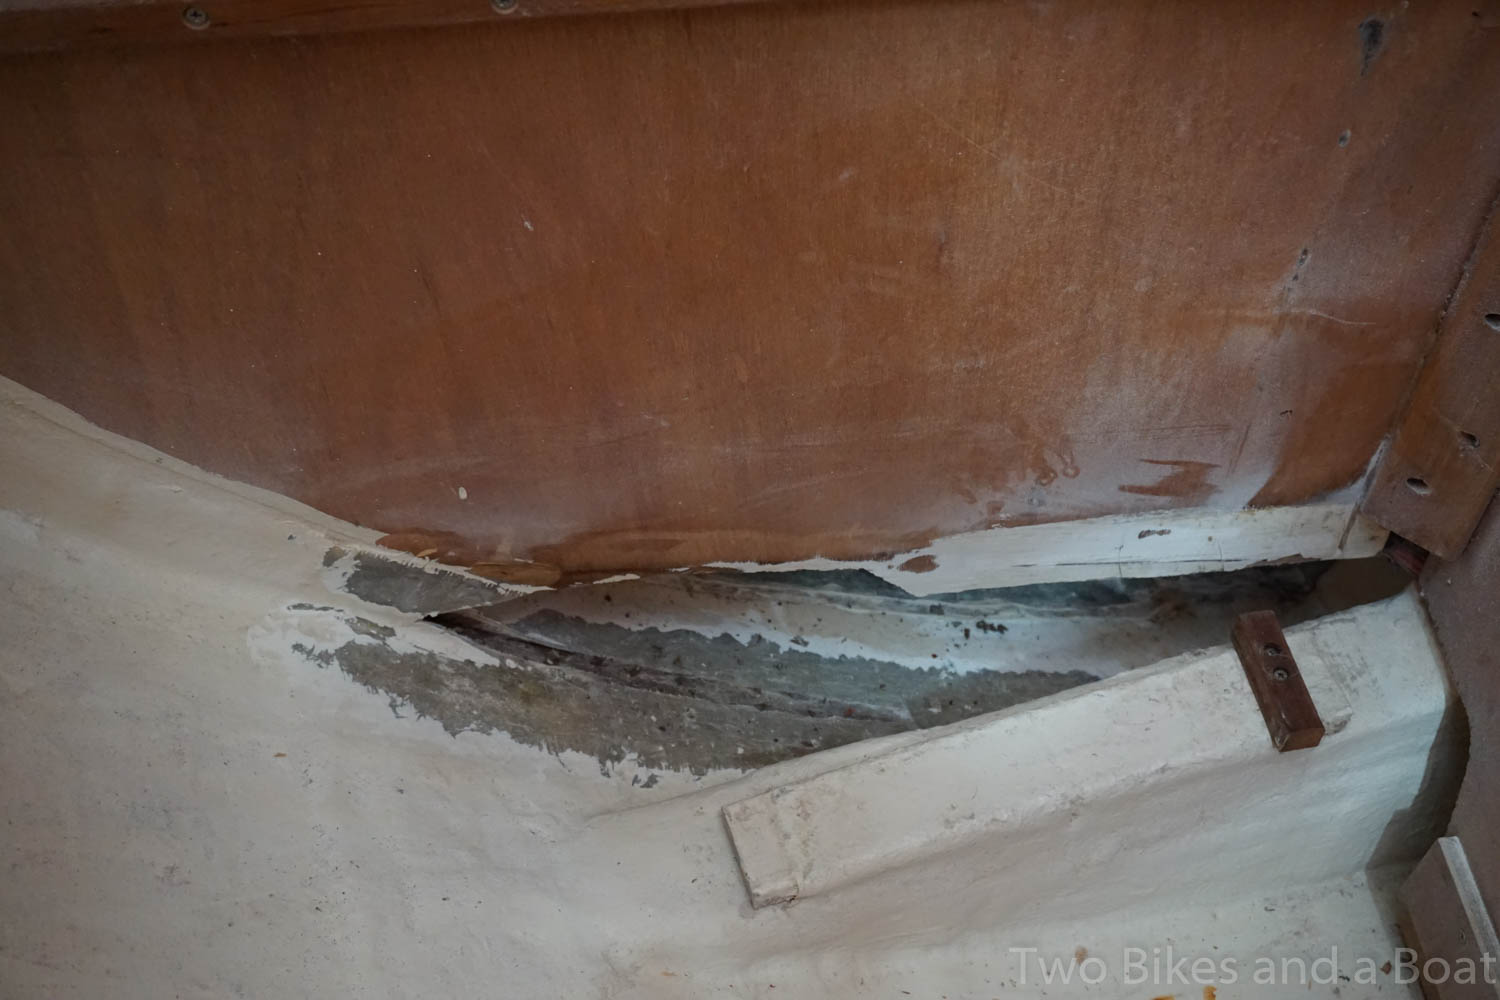
This was a real boat owner’s problem, the unexpected fix needed as part of the current unexpected fix. This issue delayed the project by about 2 weeks as we worked out what to do and how to do the repair. In the end we took the boat back to Bath and Dixson at Loyalist did the repairs in record time and the bulkhead is now better than new.
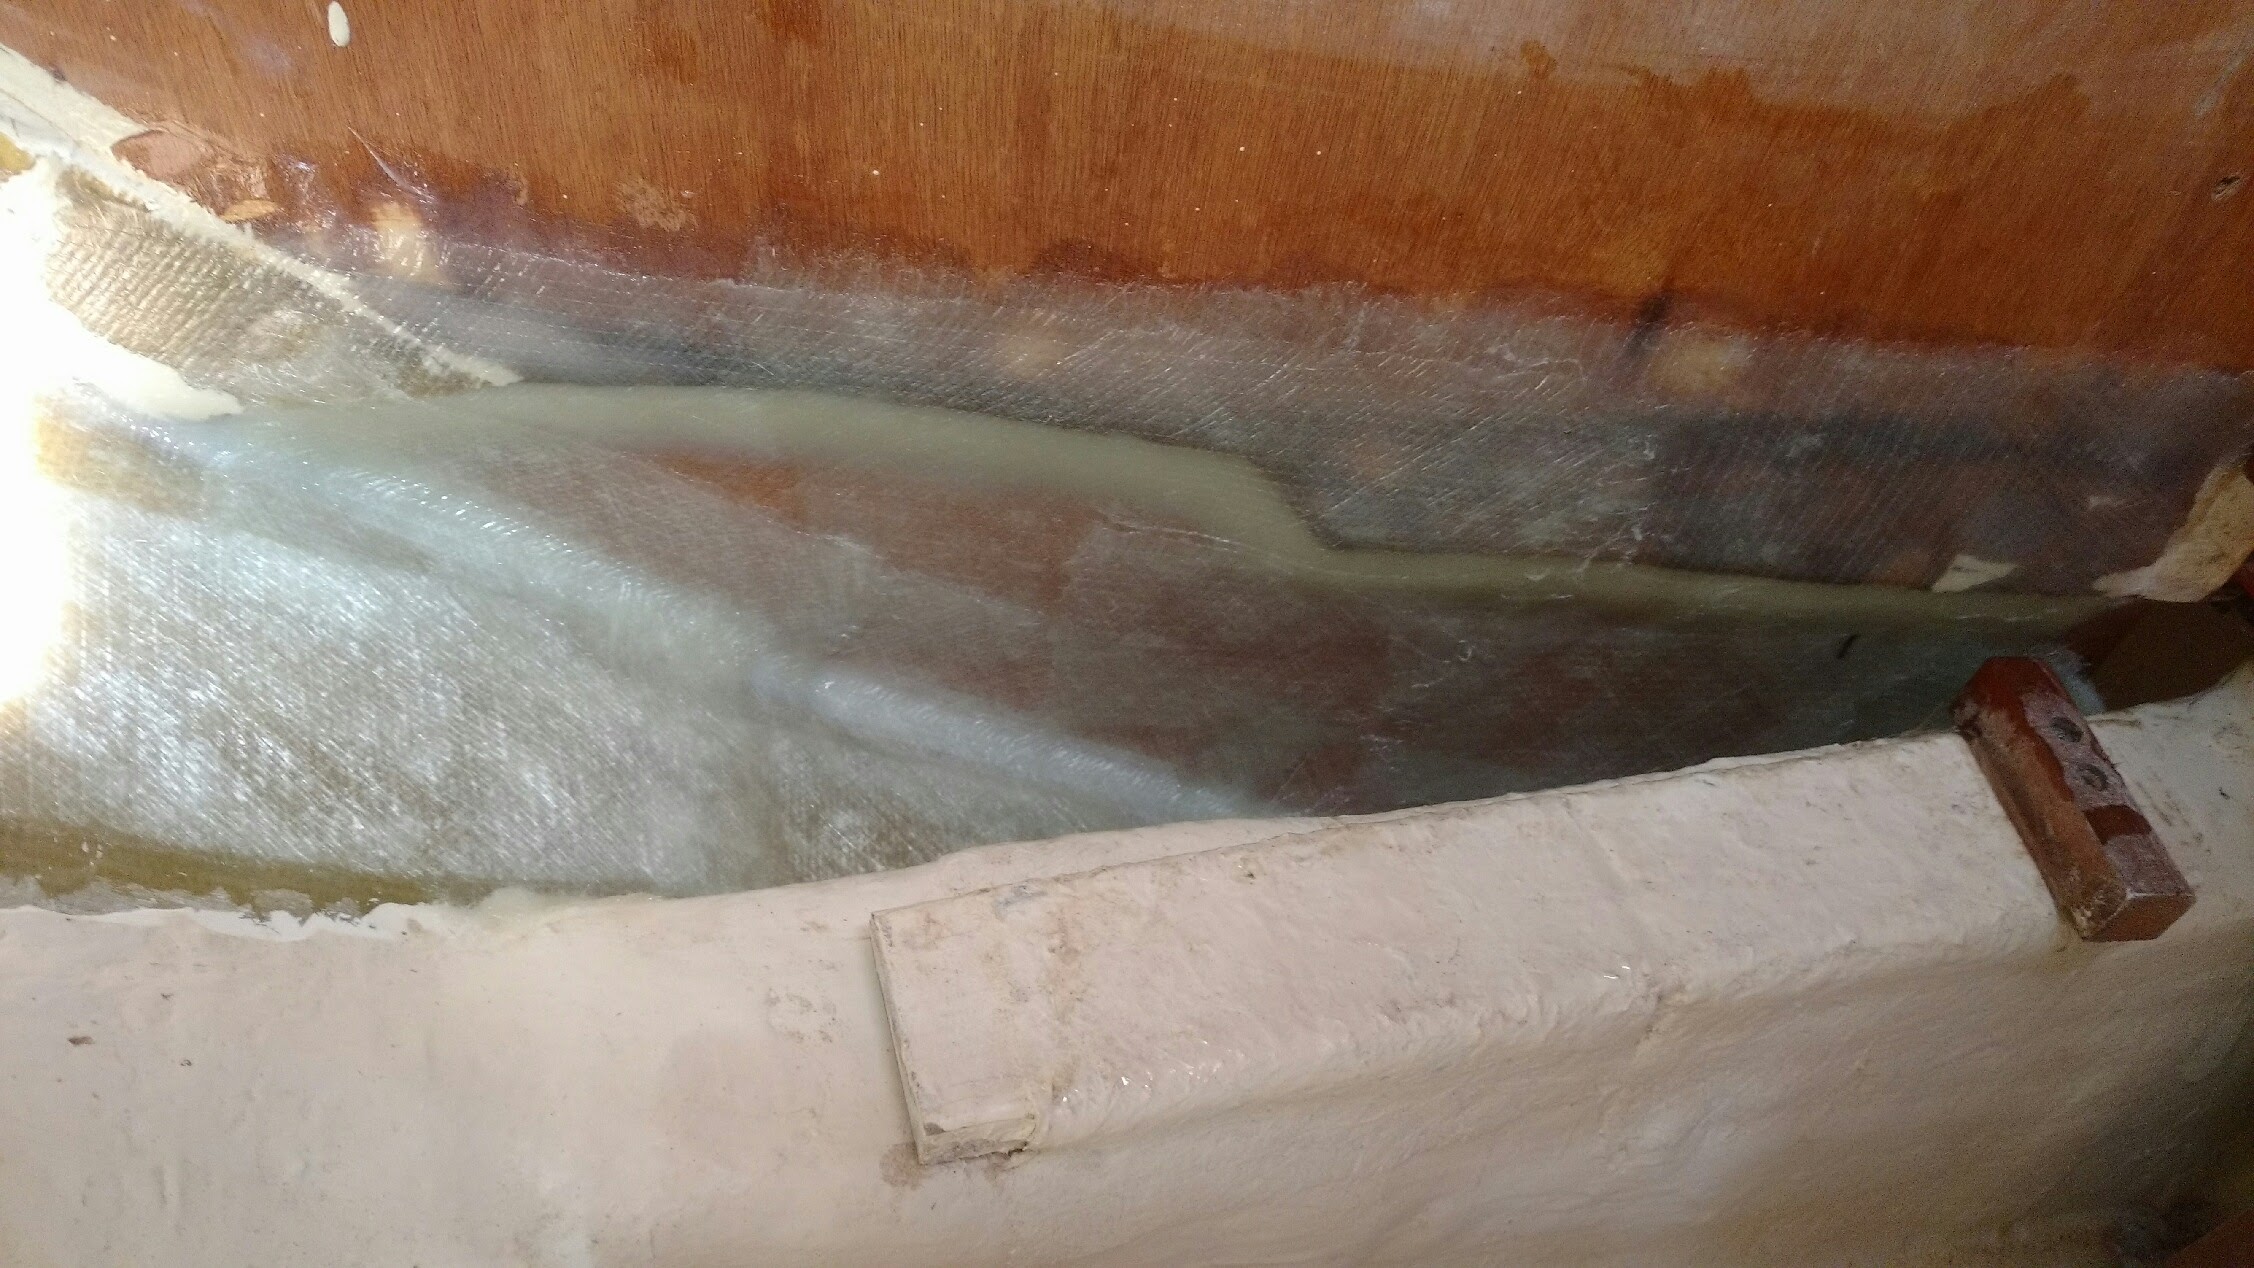
The vent now has a clear path to the bilge and we should not see a repeat.
Tank Installation
Getting the tanks installed was perhaps the easiest part of this job. As the outside dimensions of the tanks are close to identical to the old tanks, all the bracing still worked and there was little rework. Getting the deck fill reattached on the starboard side was not easy as access on my boat is very limited, port side was no issue at all. I supported the outboard edge of the tanks with expanding foam to minimise any movement or flexing of the tank.
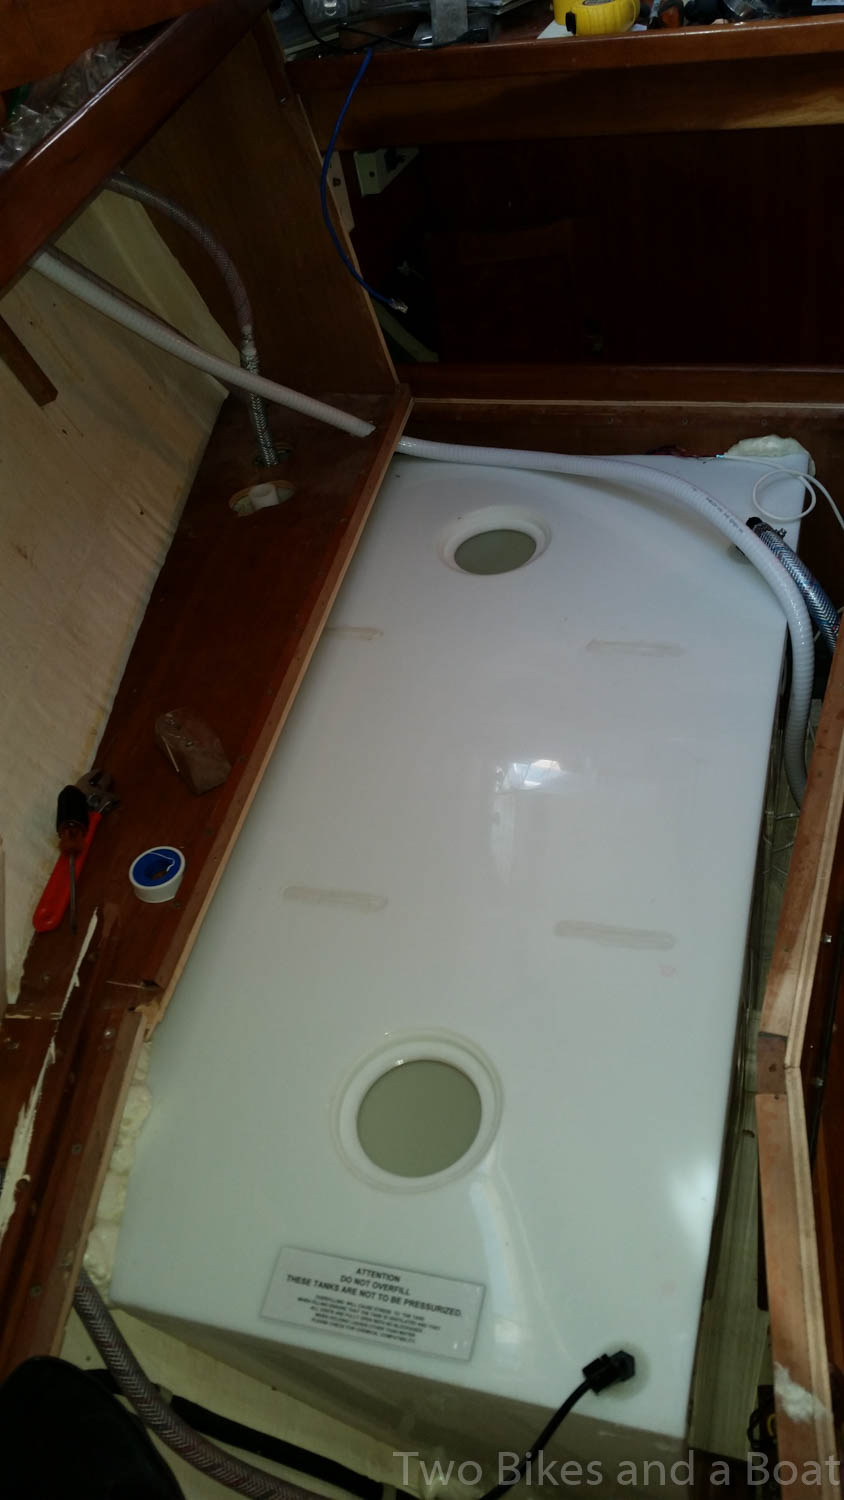
The white hose over the top of the tank is a second vent for the holding tank to bring it up to Peggy Hall standards.


Here I am securing the seat backs, there are a lot of screws to install and it is very fiddly, a good stumpy screwdriver is essential for this work.
I ran new fill, vent and feed hoses so the entire system is new from the deck filler down to the main manifold in the bilge.
With the tanks installed, “all” we have to do is put away all the tools and clean up the boat, what you can’t see in this picture is the mess on the other side of the cabin.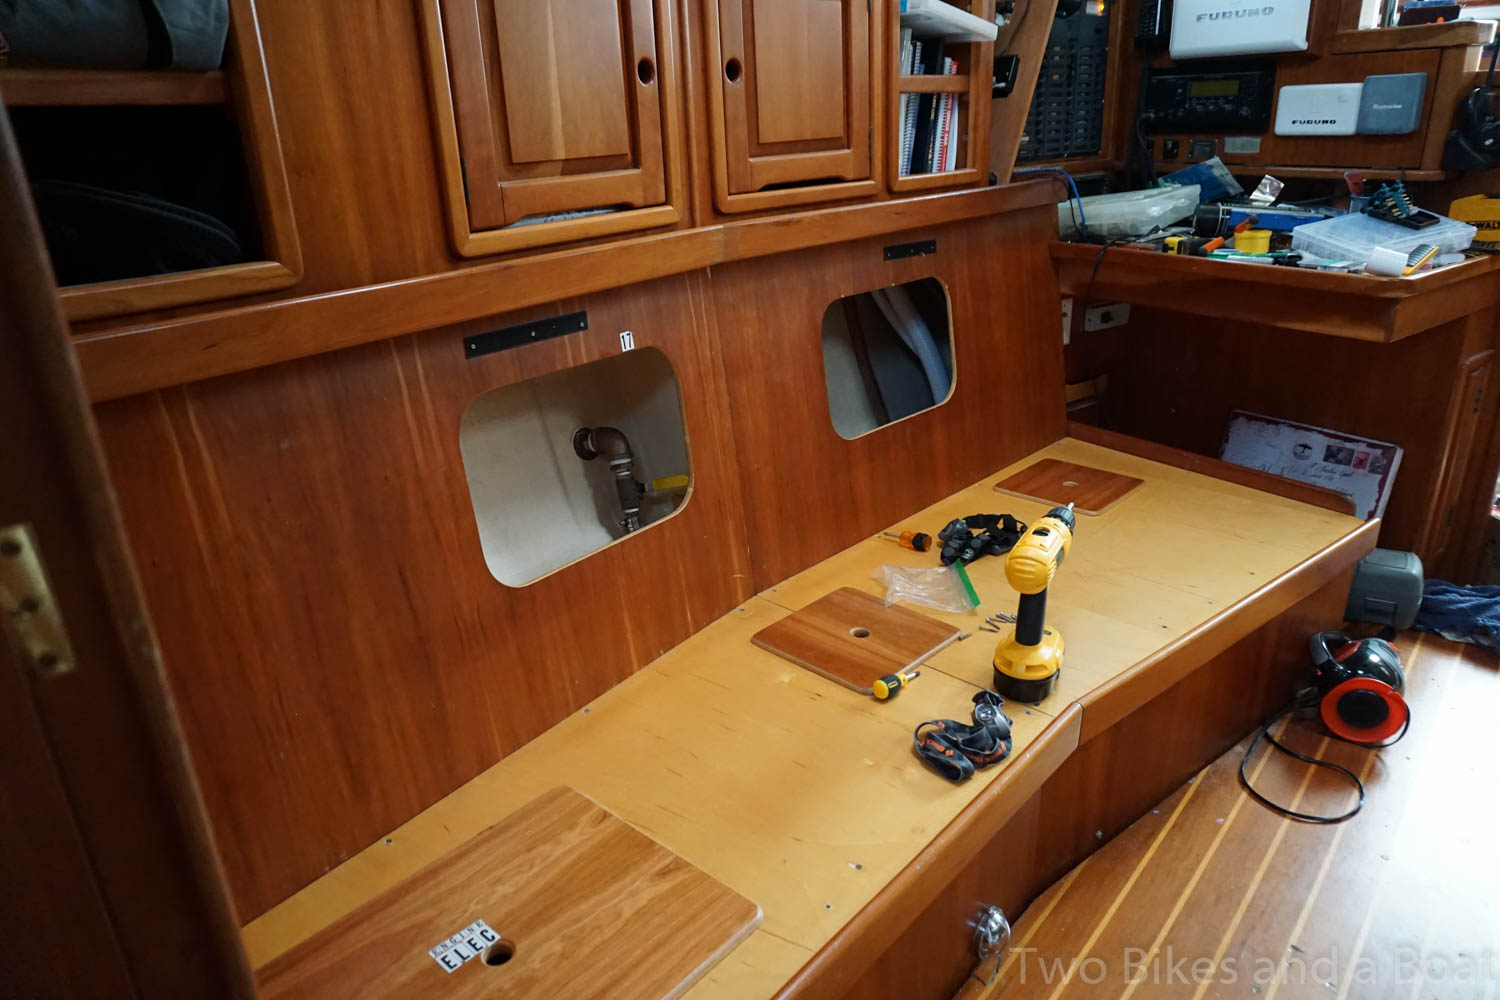
Final Thoughts
Is this job a sensible use of our time? Overall, despite the frustrations I would say yes. The job is time consuming and though a yard would do it far faster than I did, the costs would be high, at least 8 hours per side, not including the rebuild of the bulkhead.

Matthew,
My Sage 43 has leaky tanks that I have to replace. I see the draw for one tank. Is the other a mirror image? Do you have the drawing you could send me?
Thank
Marc s/v Gandalf 3 #21